Dictating on a Mac with Dragon NaturallySpeaking
As I have mentioned before I’m not a big fan of MacSpeech Dictate. So I use Dragon NaturallySpeaking in Windows XP running under Parallels Desktop 4 when I need to dictate something. It’s working very well, but it is of course very tedious to have to copy and paste everything I dictate from Windows back into my Mac applications. Luckily Tim Harper has made tightvnc-dns, a Windows application that reroutes the generated keystrokes from Dragon NaturallySpeaking back to the Mac side. You can’t use Dragon to edit the text you dictate this way, but for shorter pieces of text it is very practical.
It is very easy to set up, just follow these simple steps:
- In the configuration for your Windows virtual machine in Parallels Desktop, under Network Adapter 1, select “Shared Networking” (or the equivalent for VMware Fusion).
- In System Preferences, under Sharing, enable screen sharing:

Note your IP address (circled in red). - Click “Computer Settings”. Enter a password, otherwise tightvnc-dns may not be able to connect.
- In your Windows virtual machine, download and unzip tightvnc-dns.
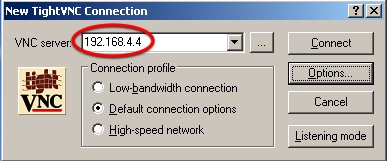
- Double-click vncviewer.exe:

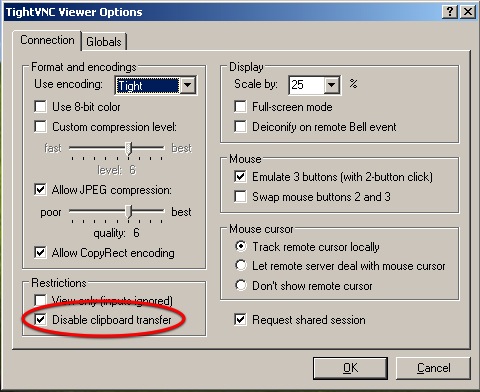
Enter the IP address from step 2 (not necessarily 192.168.4.4 :)). - Click “Options”:

Click “Disable clipboard transfer”. And reduce the scale if you want a smaller window. - Click “OK” and then “Connect”. Enter the password from step 3 and click “OK”.
- Switch to a Mac application, making sure that vncviewer is still selected in the Windows virtual machine and Dragon NaturallySpeaking is running and active.
- Start dictating and the text should appear in the active Mac application!
 TextSmith
Blog
Comments